Category Archives: Javafx Code Demos

Splash Screen with Javafx

Splash Screen code walk through

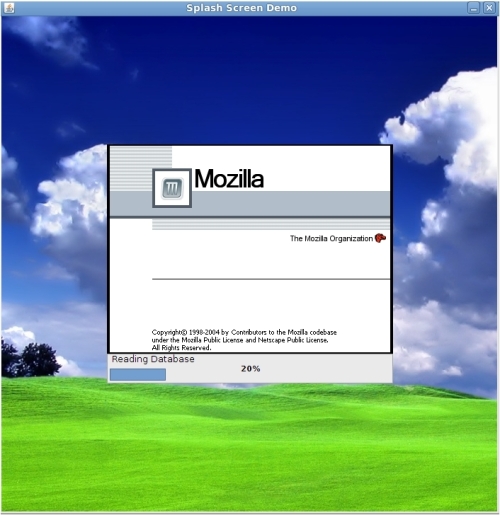
Splash Screens are needed for applications we develop in Javafx to show the user about the progress of any background processes that needs to be completed before the GUI can come up completely. Recently I came across one such problem. I had an application that had huge amounts of background work to complete before the Stage and scene could be set for the GUI to come up. Therefore I looked up into the SplashScreen JavaAPI but it does not turn out to be very useful since it only displays the image mentioned in Manifest file or the one passed through the setImageURL() method. I felt rather than using this I can create my own Splash Screen.

To create a Splash screen I have created a class ShowWindow which extends the Jwindow. This basically constructs the splash screen having 2 components. 1) Image to be displayed to the user. 2) ProgressBar to the user displaying a progress and a titled border around the progress bar to display what is completed at a given time period. These 2 components are packed together in a content pane and displayed to the user when the application loads. Therefore here the Main application GUI is Javafx(desktop and desktop dock) but the splash screen is a java swing application. So it appears as if all of these are part of javafx Main GUI.

The ShowWindow class also implements the Runnable interface in order for the splash screen to run in its own daemon thread, so that it does not bog down the main thread. The daemon thread once started is put in a loop to update the progress bar and the progress titles as soon as it receives inputs on the amount of completion on the background process.

As an example below we have the front end GUI written in Javafx and it loads completely a user desktop with a dock at the top. Usually when we develop a real time applications we have lot of processing needed at the back end, therefore it sometimes becomes necessary to display a Splash screen with a progress bar to display the status and progress.

Here the program starts with the run method of a stage which is overridden. I have first created a Stage applying a background image to it so that the stage background is not blank during the background process.  At this point by default I have set the progress bar value to 10% and String displayed as “Stage Set” since the stage creation is done at this point.

I have created a Background function/method which could contain calls to background processes. For now I have put thread sleeps for 2 second intervals.(simulating background java function call which may take more or less 2 secs using thread sleeps). As a Java Developer, we start demanding those things which are generally done by the concept of multi-threading in Java. Remember, JavaFX is single threaded application. Therfore we can achieve multithreading using Timeline.

Creating a Timeline variable which calls the background function/method makes sure that a seperate thread runs the background function/method containing background processes earlier created. Now when each of the task in the background function/method is completed we can update the progress bar with new values. Remember that Progress bar displayed to the user is done using swings in a seperate daemon thread. Therefore we need to update the progressbar value with new incremented values as and when tasks are completed. To achive this we can create a static public progress bar value int variable which can be updated with new values so that the deamon thread that runs in a loop sees the updates done to this variable and then updates the progress bar’s progress.

Press on the Launch button to launch the application using webstart.

For windows users pressing on the Launch button would start the Application in java web start.

However Linux users may face the problem of just jnlp the file being downloaded onto the system. However we can still get the application started by opening the terminal and setting the JDK home to 1.6 and then start the application by using

export JAVA_HOME=/usr/jdk1.6.0_18 and then set the PATH variable export PATH=/usr/jdk1.6.0_18/bin:$PATH

After doing the above just execute:-   javaws SplashScreen.jnlp

3 Comments

Filed under Javafx Code Demos

Movable Tabbed Panes in Javafx

Tabbed panes code walk through

We are familiar with the tabbed panes but there are no in-build tabbed panes with Javafx SDK. Therefore, I felt a need to develop this tabbed pane functionality. The tabbed panes are basically set of windows stacked upon each other. Therefore all we do is to bring the pane to display, to the user by using the toFront function to bring the window in front of all the other windows when clicked upon it.

Each of the tabbed panes are a group of 3 Rectangles and a title text. The Grey outer rectangle that forms the outer border for the tabbed pane giving the border effect. The second rectangle is the tab rectangle containing the text displaying the heading of the tabbed pane which is positioned based on the position of this tabbed pane in the series of tabbed panes being displayed. The final Rectangle is the content rectangle which forms the content of the tabbed pane containing all the controls if specified.

The Rectangle containing the title of the tabbed pane listens on mouse events. When it detects the mouse pressed event the corresponding tab is brought to the front to be displayed to the user. The rest of panes then fall to back in the Z order.

These tabbed panes also listen on mouse dragging events to implement the shifting of the tabs between each other when we drag the tabs to appropriate positions. These tabs can be exchanged among each other to simulate the feature present on browsers.

The tab shifts are implemented by maintaining a Node array that contains all the tab rectangle nodes, similarly another node array to contain all the texts of the tab headings. These node arrays are then navigated on mouse drags and placed in appropriate position at mouse release events. When mouse press occurs on the tabs then these tab X coordinates are stored. Hence if the drag is significantly low then the tabs are repositioned back to its original X value. Here we don’t have to worry about the Y coordinates since the tabs can be moved only across X axis.

One more feature that this tabbed pane includes is the background. The tabbed panes can have images as background therefore while constructing the tabbed panes in the Main class the background variable can be passed with the ImageView object which is displayed as background to the user over which the controls are placed therefore giving a better picturesque effect. If the background variable is not defined then by default the  content rectangle is filled with white color over which the controls are placed. The content[] array variable can be used to load various controls into the tabbed panes.

Press on the Launch button to launch the application using webstart.

For windows users pressing on the Launch button would start the Application in java web start.

However Linux users may face the problem of just jnlp the file being downloaded onto the system. However we can still get the application started by opening the terminal and setting the JDK home to 1.6 and then start the application by using

export JAVA_HOME=/usr/jdk1.6.0_18 and then set the PATH variable export export PATH=/usr/jdk1.6.0_18/bin:$PATH

After doing the above just execute:-   javaws Tabbedpanes.jnlp

Leave a comment

Filed under Javafx Code Demos

Image Drag and Drop

Image Drag and Drop Code walk through

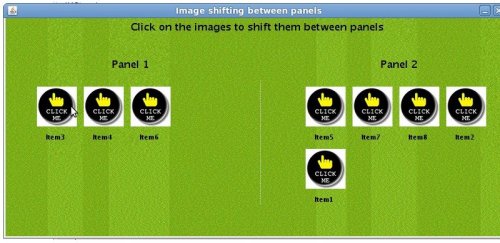
Drag and drop of images can be done by changing the layoutX and layoutY of the image at mouse dragging event. Originally Java provides the java.awt.dnd package to perform all the drag and drop operations. This however is an additional overhead to implement. There are no proper documentations which can help us do this operation, hence I felt a need to develop this application.

The concept is more or less same as the previous post of image pop up but this time we need to implement the mouse dragging event rather than the mouse clicking event. When mouse pressed we save the position X and Y into a temporary variable, this is done so that if we drag the image just within the same panel. On mouse released we can re-translate the image back to the original position it was before.

At mouse dragging we need to load the mouse pointer’s X and Y values into the image X and Y values. This will provide an illusion of dragging of image. Once the image is dragged over the separator to the other panel we know that at mouse release event we need to position the image being dragged into this panel. Hence as soon as the mouse is released the space calculations are quickly done to reposition the images in both the panels.

The Scale effect on release is obtained by the ScaleTranslation animation package.  When the image is initially clicked, the image node and the corresponding text node is stored in a temporary image node variable and the text node variable which is then used for dragging about a scene. The original node and the text nodes are deleted from the node array. This is because we can’t move original nodes about the scene anywhere. The nodes are bound to a group within a scene hence dragging would not be possible over scene if the original nodes are not stored in a temporary node variables. So they are deleted before, and then we drag these temporary nodes. At mouse release these nodes are added back into node array bound to the group within a scene and repositioned.

The space calculation function is called when we observe a movement of node between panels. This is a costly function, since on a node array containing many images would take time. However it necessary to do this since when we move the nodes between panels we need to reposition the remaining items in the node arrays so that the deleted node from one panel and the added node into the other panel are aligned appropriately.

There are 2 node arrays controlling each of the panel nodes. The image node and the text node are grouped into single node array in each panel display. Therefore if the position of the image node is ‘n’ then its corresponding text is ‘n+1’ on a node array.

Press on the Launch button to launch the application using webstart. 

For windows users pressing on the Launch button would start the Application in java web start.

However Linux users may face the problem of just jnlp the file being downloaded onto the system. However we can still get the application started by opening the terminal and setting the JDK home to 1.6 and then start the application by using

export JAVA_HOME=/usr/jdk1.6.0_18 and then set the PATH variable export export PATH=/usr/jdk1.6.0_18/bin:$PATH

After doing the above just execute:-   javaws DragnDrop.jnlp

4 Comments

Filed under Javafx Code Demos

Image PopUp between panels

Image PopUp code walk-through

This program was really tiring one, since getting this effect needed lot of space adjustment calculations. I believe there must be a simpler way to do it but, I have tired most of it and got stuck half way with minimal support on the API sites for Javafx. Since javafx is still in the nascent state we got to deal with this. The major challenge was that the amount of nodes which can be present in each of the panel was dynamic. Therefore we need to maintain 2 node arrays to store all the image view nodes and the text nodes present in each of the panels.

However on significant research found that we can create node array and add any node into it using the insert statement.  Navigation through the node array and obtaining the image node was done by implementing the MousePressed event. Here image node is pressed for shifting it to another panel, then the image node and text node corresponding to this click is captured and shifted to the next panel and space re-calculated to reposition the image appropriately in the other panel.

One important point is to identify which panel the image being clicked upon is present in. This is obtained by assigning an id during the creation of the nodes itself. ID identifies the node and is a string.

We need to also maintain a presencecheck string array which contains all the node id’s present in panel 1. As soon as the node is pressed it is shifted to panel 2 and the presencecheck array is quickly traversed to locate the node id. Once the node id is found in the array we know it has come from panel 1 and we got to shift it to panel 2. Once the shift is complete and space re-calculated, we then delete the node id entry from presencecheck array,  indicating node is now present in node 2.

Similarly when we click on a image node present in the panel 2 the presensecheck array will now not return any node id and therefore we know to shift the image node from panel 2 to panel 1. Once the node is shifted we insert the ID of this node into the presencecheck array.

Press on the Launch button to launch the application using webstart.  

For windows users pressing on the Launch button would start the Application in java web start.

However Linux users may face the problem of just jnlp the file being downloaded onto the system. However we can still get the application started by opening the terminal and setting the JDK home to 1.6 and then start the application by using

export JAVA_HOME=/usr/jdk1.6.0_18 and then set the PATH variable export export PATH=/usr/jdk1.6.0_18/bin:$PATH

After doing the above just execute:-   javaws ImagePopUp.jnlp

Leave a comment

Filed under Javafx Code Demos

ListView Customizations

This is another code to customize ListView. Typically a list view will contain a scroll bar and the list of items in the following manner in Javafx.

We can customize the above listview to be more captivating by implementing Cascading Style Sheets in javafx. The major advantage of CSS in Javafx is that on applying CSS to one particular control such as a listview all the occurrences of listview’s in all other scenes will inherit the properties mentioned in the stylesheet. This is useful since we don’t have to write each individual style class for each list view used in various scenes of an application.

However if we want to implement different stylesheet properties for the controls then we can define a style class explicitly in the javafx.css file and then include this styleclass in the StyleClass variable for a particular control.

The following code uses Translate Transition class to provide the slow translation that happens to reach the center of the screen.

Originally the list view does not select the cells when we hover the mouse over it. Here we can find that the cells get the item withing that cell and highlight it when you hover the mouse over. This feature is obtained by implementing the cellFactory within the ListView. We can override this function and select the cell when the mouse enters a particular cell.

The tooltip appears based on the ListCell the mouse is hovered. The tooltip cannot be translated to the position of the mouse pointer using the translateX and translateY variables. This is a weird behavior I have encountered in Javafx. But a way to get around this problem is to embed the tooltip within  a group and then translate the group to the point where the mouse pointer is while it enters a list cell. The data within the tooltip is populated with the cell name, the mouse pointer is on.

Observe that the List scroll bar is not visible. This is obtained by reducing the scroll bar width to zero and then making it transparent or invisible using javafx css.

You can launch the ListView program by clicking on the following link

For windows users pressing on the Launch button would start the Application in java web start.

However Linux users may face the problem of just jnlp the file being downloaded onto the system. However we can still get the application started by opening the terminal and setting the JDK home to 1.6 and then start the application by using

export JAVA_HOME=/usr/jdk1.6.0_18 and then set the PATH variable export export PATH=/usr/jdk1.6.0_18/bin:$PATH

After doing the above just execute:-   javaws ListView.jnlp

Leave a comment

Filed under Javafx Code Demos

Desktop Dock effects in Javafx

Code Walkthrough DockEffect

I would not start of at the very basic level I would expect you to know, to at least create stages and scenes and to implement scenes within a stage.

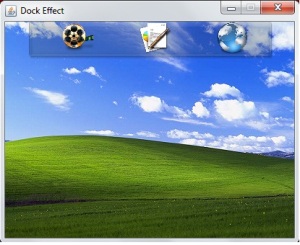
For obtaining the below effect you could use the ScaleTransition and TranslateTransition packages. The upward and downward movement of the dock panel is controlled by the translate transition package. The effects of dock icons are obtained by the scale transitions which will scale the images quickly based on the scale transition time defined in milliseconds.

When the mouse pointer enters the image in the panel it is captured and then Scale Transition is called to provide the dock bounce effect as soon as the mouse exists the image the transition is stopped and the image scaled back to its original size.

Similarly when the mouse pointer enters the dock panel then it is captured and the dock panel is translated downward across its Y axis to provide the slow drop down effect. Also when the mouse pointer exists the Dock panel it is translated back to its original position.

Below is a sample for dock effect that you basically experience in Ubuntu and Windows. If you want the code for the same, I can post that to you.

Press on the Launch button to launch the application using webstart.  

For windows users pressing on the Launch button would start the App in java web start.

However Linux users may face the problem of just jnlp the file being downloaded onto the system. However we can still get the application started by opening the terminal and setting the JDK home to 1.6 and then start the application by using

export JAVA_HOME=/usr/jdk1.6.0_18 and then set the PATH variable export export PATH=/usr/jdk1.6.0_18/bin:$PATH

After doing the above just execute:-   javaws DockEffect.jnlp

11 Comments

Filed under Javafx Code Demos

Javafx Basics for beginners

On Ubuntu boxes

Download the latest Netbeans IDE 6.9.1 here (http://netbeans.org/downloads/). There are various links but if you are only interested in developing Javafx apps then you could download the link headlining JavaFX. This package will support all the features you need to develop a JavaFX application  (~116MB).

Advantages of  Netbeans IDE.

The major advantage of this IDE is that its very light and consumes less memory while you develop applications. This would mean you can open concurrent applications even on computers which is low on resources.

Another major advantage is that the IDE is packaged with JAVAFX SDK therefore there is no additional overhead of installing FX SDK additionally and you can directly start of coding.
Installation Instructions

Windows installations are simple and would not need any instructions. For Linux installations following are the steps. Suppose the installation file is netbeans-6.9.1-ml-linux.sh provide the permissions to the same (chmod +x netbeans-6.9.1-ml-linux.sh) and start the execution setting the java_home and the path to 1.6 on the terminal.

1) export JAVA_HOME=/usr/jdk1.6.0_18

2) export PATH=/usr/jdk1.6.0_18/bin:$PATH

3) ./netbeans-6.9.1-ml-linux.sh

Follow the instructions and provide the directory where the installation must take place and then wait till installation is complete. (This installation will not require any sudo permissions)

Troubleshooting

You may encounter the following error after installations and while starting the application and running a JAVAFX program.

1)  Error: JAVA_HOME is not defined, cannot find "java" command.

To get around this problem the simplest way would be to open the terminal and set the path to JDK 1.6 explicitly and then execute the Netbeans executable on the same terminal.

example: –

1) export JAVA_HOME=/usr/jdk1.6.0_18

2) export PATH=/usr/jdk1.6.0_18/bin:$PATH

3) /usr/netbeans-6.9.1/bin/netbeans

However, this would be troublesome to do every time we want to open the IDE, therefore you could open the Netbeans shell script file present in the bin folder as specified above in a notepad and paste the 2 lines (export JAVA_HOME=/usr/jdk1.6.0_18 and export PATH=/data/jdk1.6.0_18/bin:$PATH) at the top of the file and save the file. The next time you open the Netbeans IDE it would be able to locate the JAVA_HOME and then would resolve the issue.

For more info on this you could ping me on the same.

Why Use Javafx

Javafx is basically a scripting language which is a powerful way to develop web and desktop applications with all the gloss, effects and animations you need. This is actually simple to learn and code. There are enough libraries to provide a flashy GUI and give an extra punch. We know that the traditional Swing and AWT are not enough to provide the front end that we would like for the users to experience , therefore if you need perfect UI and cool animations then JavaFx is the way to go. However I would like to share few of the samples that I developed during my learning of Javafx. Some of the loop holes and the ways to find work around’s to obtain the features that we desire.

Additionally, Swing and AWT would require a lot of effort and coding to obtain the animations and the effects that we desire.  We would also be able to provide rich Internet experiences and embed these into the web pages for great user experience.

Leave a comment

Filed under Javafx Code Demos